![]()


5 Handy Excel Tips & Tricks to Improve Your Productivity
Microsoft Excel is the most popular spreadsheet application for business, and has set the standard for industry with its powerful functionality and range. Excel is used to capture, analyse and report data, and is commonly used across all parts of a business – from finance, human resources, marketing, operations and sales – because of its built-in formulas, graphs and other advanced data analysis capabilities.
As one of Microsoft Office 365’s core applications, Excel is an absolute powerhouse and getting familiar with the basic ins-and-outs, let alone its more advanced functions, can take some time. That’s why we’ve put together the following top 5 handy Excel tips and tricks, to help improve your productivity and familiarity with the application:
- 1. How to use keyboard shortcuts in Excel
- 2. How to freeze cells and header rows
- 3. How to wrap text
- 4. How to filter a spreadsheet
- 5. How to transpose cells
- 6. Bonus Tip: How to convert a spreadsheet to PDF
1. How to use keyboard shortcuts in Excel
Keyboard shortcuts are one of Microsoft’s handiest features which is why it’s the first of our Excel tips and tricks. Shortcuts consist of a button combination of control (ctrl) and a letter, and will generally work in most Microsoft programmes. Here’s a list of our favourite shortcuts:
- CTRL C – to copy a selected cell or range of cells
- CTRL X – to cut a selected cell or range of cells
- CTRL V – to paste your cut or copied cells
- CTRL A – to select your entire worksheet
- CTRL P – to print your worksheet
- CTRL T – to convert a range to a table
- CTRL N – create a new workbook
2. How to freeze cells and header rows
Ever worked with a large spreadsheet, and found it hard to remember how a column or row relates to another as you’re scrolling through the data?
With Excel, you can freeze columns and rows (either singly or in a group) in any part of a spreadsheet, which means that row or column won’t move. Simply click just below the row or to the right of the column you want to freeze, and click View on the Ribbon, and choose Freeze Panes.
For example, in the below image, clicking in cell C2 and choosing View > Freeze Panes will mean that columns A and B and the rows above C2 will not move from your view as you scroll down the columns or across the rows. Lines will be visible on the page once the cells are frozen, so you can see where you’ve set the cells to remain frozen.
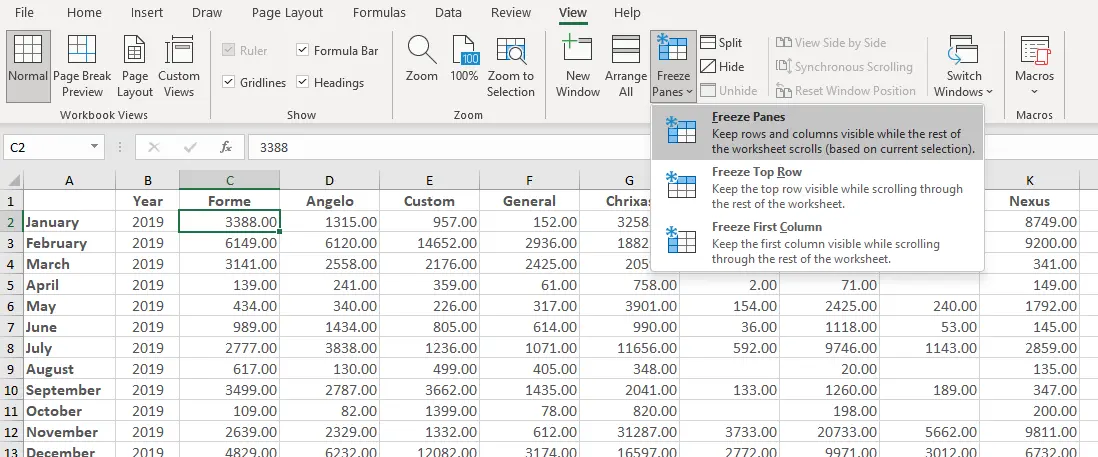
Freezing panes in Excel
3. How to wrap text
When you have text that doesn’t fit in the current width of a cell, by default it doesn’t wrap. To change this so that the text will wrap and fill the existing cell, click Home on the Ribbon, and choose Wrap Text.
Note: you may need to tweak the row height to show the wrapped text in full.
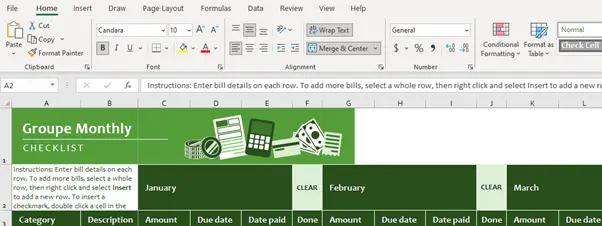
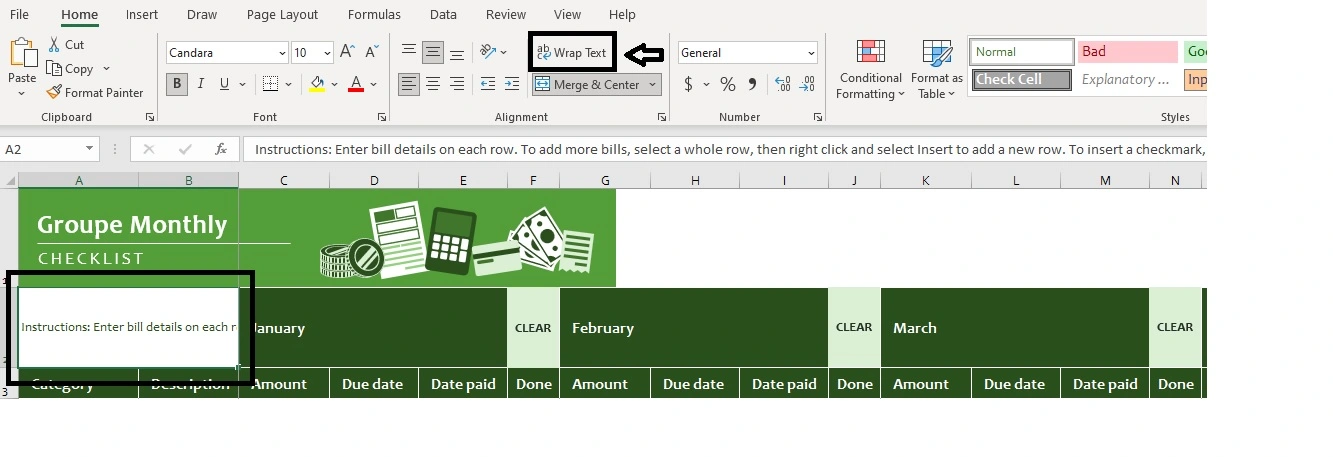
Resulting wrapped cell text
4. How to filter a spreadsheet
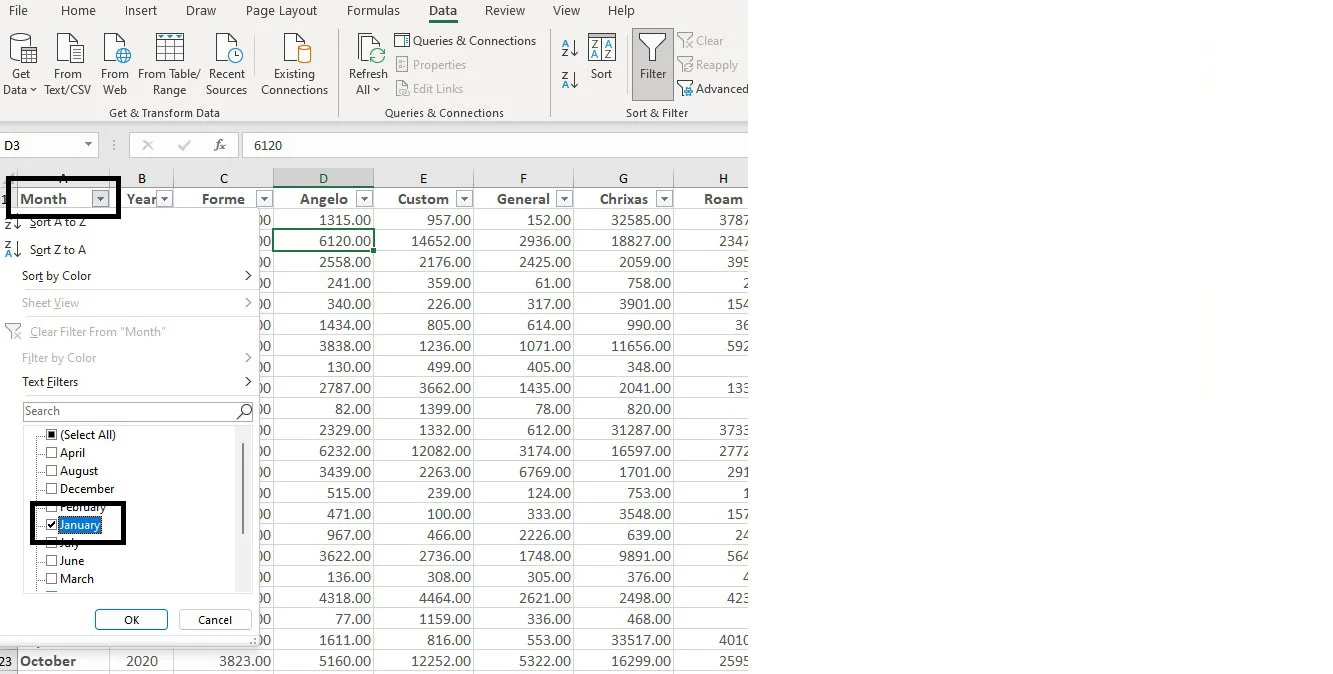
Filtering is one of the most usable and common tasks in Excel, as it allows you to view a subset of your relevant data. Simple filtering allows you to restrict the number of data results shown within columns, and can be applied to multiple columns for a basic drill through without needing to use a pivot table.
To apply a simple filter, click anywhere in the spreadsheet that contains a range of data, choose Data on the Ribbon, and click Filter. This will apply dropdown arrow next to each column heading.
Set a simple filter in Excel
To use the filter, click one of the dropdown arrows on a column you want to filter, and select what you want to filter by.
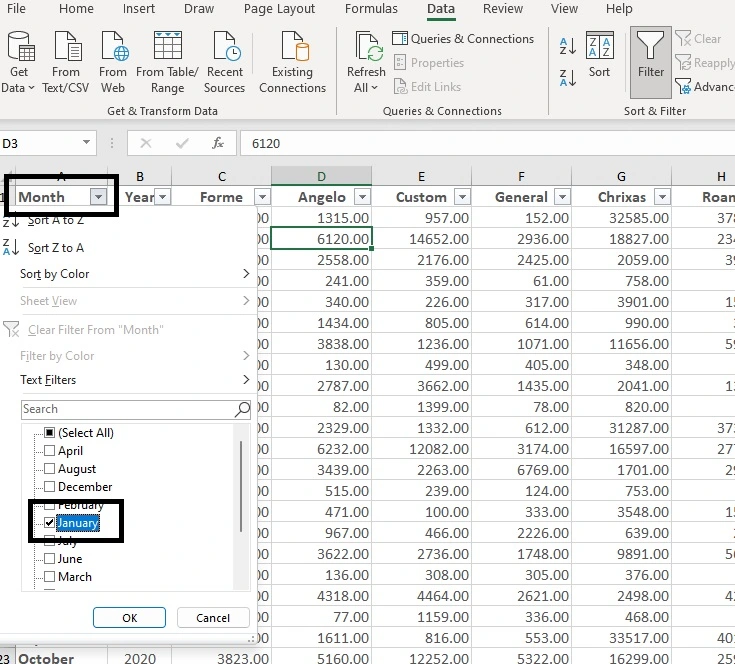
Applying a simple filter
5. How to transpose cells
Sometimes when you are presented with data, it may not be laid out in a way that is ideal. You can use Transpose to change a vertical data range to a horizontal data range, and vice versa. This works by using Excel’s Copy and Paste Special function.
To transpose a range, highlight it and click Home on the Ribbon, and then click Copy (or use your keyboard shortcut CTRL + C). Then, click below the range you’ve copied in a blank cell, and choose Home > Paste and the Paste Special option Transpose.
This flips the data, and you can then delete the data above it (the non-Transposed data range).
Resulting transposed range
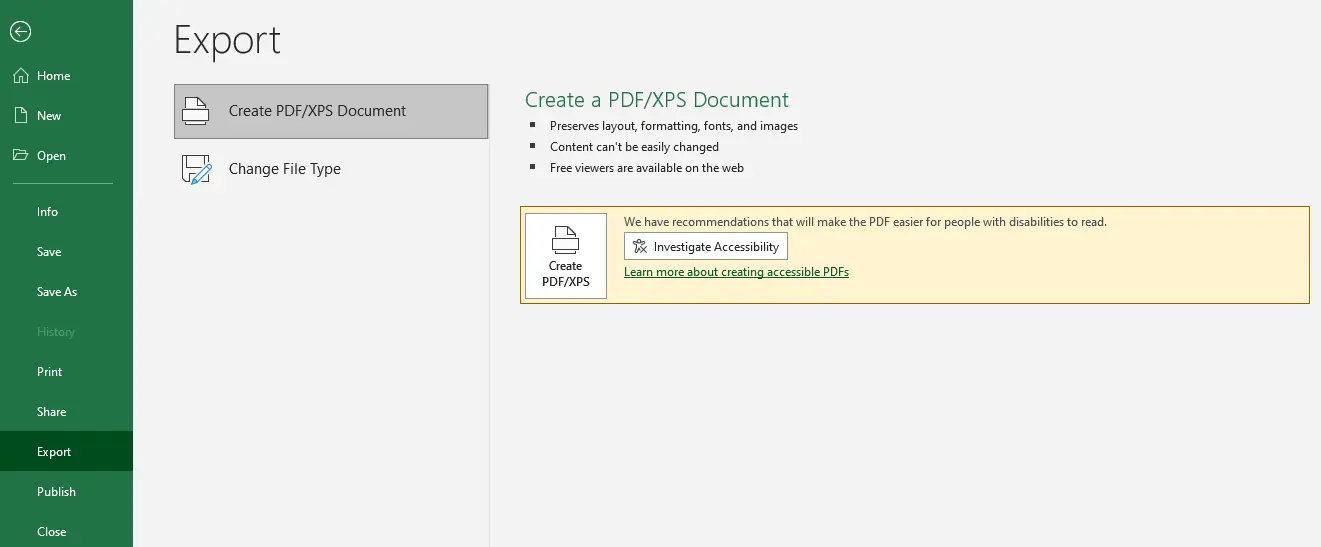
6. Bonus tip: how to convert a spreadsheet to PDF
We’ve covered off our top 5 basic Excel tips and tricks, so here’s our bonus tip – converting a spreadsheet to PDF.
This is useful when you want to share a spreadsheet of data that you’ve carefully collated, formatted and created graphs from, and you want to print or email it in a clean format that isn’t Excel itself (so the user doesn’t see the underlying spreadsheet, formulas or data). To convert a spreadsheet to PDF, it’s a simple case clicking File on the Ribbon, and choosing Export and Export to PDF/XPS. This will open the Save As dialogue box, with the file type set to PDF. Select where you want to save it to, and click Publish.
Exporting an Excel spreadsheet to PDF
Want to find out more about Excel and Office 365?
Excel is a powerful tool for collating, analysing and reporting on data, and can be used by any function or department within your business to improve productivity, provide visibility on performance, and track important key measures. If you’d like more handy Excel tips and tricks to improve your knowledge, check out TechRepublic’s 98 Excel Tips for useful step-by-step tutorials to become a spreadsheet master.
If you’re interested in finding out more about deploying and using Excel and the Office 365 suite of applications in your business, including its collaborative cloud-based features and ability to run from anywhere, then we’re here to help.
Improve your business productivity
with Microsoft Office 365
Transform the way your business operates with Microsoft Office 365. Call us today to find out more about how Office 365 can help improve productivity, streamline manual tasks and enhance your team collaboration – we’re Melbourne’s certified Microsoft Small Business Specialists.

Chris Clark is the Founder and Chief Architect of SouthEast IT, where he leads the team in delivering cybersecurity, Microsoft 365, cloud services, managed IT support, and tailored technology solutions for Australian businesses. With more than two decades of experience designing and implementing IT systems, Chris helps companies improve security, streamline operations, and leverage technology for long-term growth through practical and reliable IT strategies.
When he’s away from the office, Chris can usually be found experimenting with craft brewing, flying drones, squeezing in a round of golf, or diving into the latest automation and IT trends – and he’s always up for a chat about any of them.